Intellij IDEA 添加本地jar包
Grails Intellij IDEA 添加本地jar包方法步骤
使用Intellij IDEA导入本地jar包:
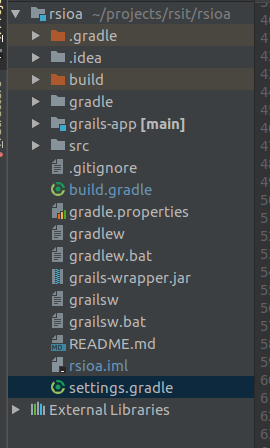
注意:这里没有lib目录。开始添加jar包:
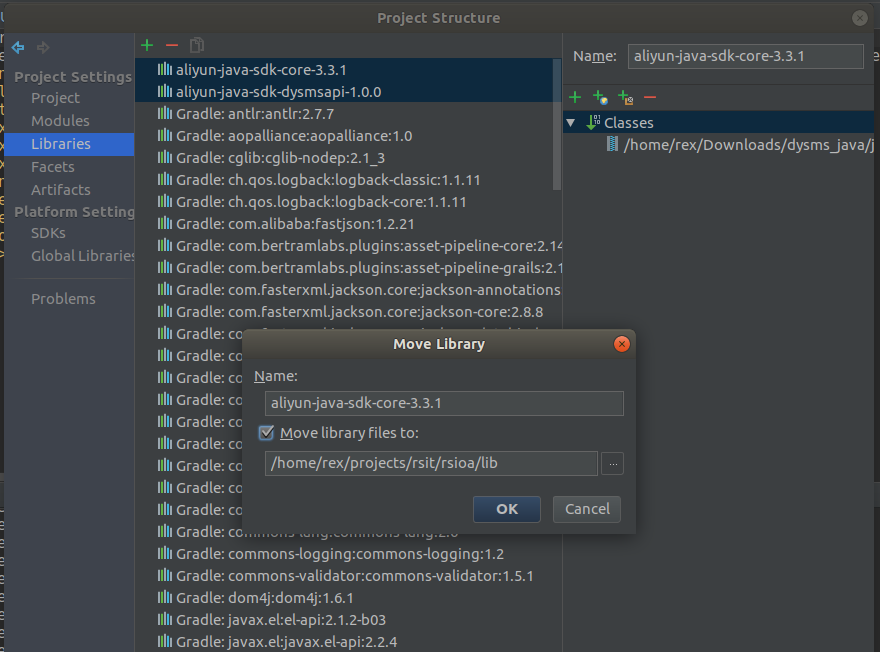
项目上右击->Open Module Settings(F4)-> Libraries,添加本地jar包:

选择框点击OK,Project Structure框点击Apply,然后选择新加入的包右击-> Move to Global Libraries,弹出框“Move librariy files to: ”打钩:
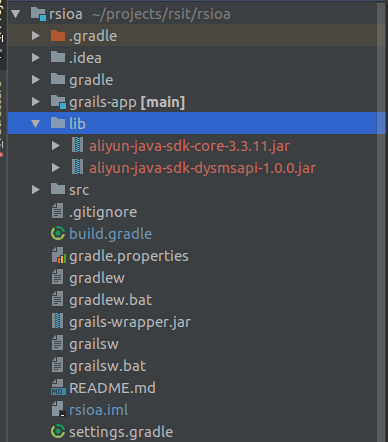
点击OK->OK,这时候项目会多一个lib目录,里面有我们的jar包:
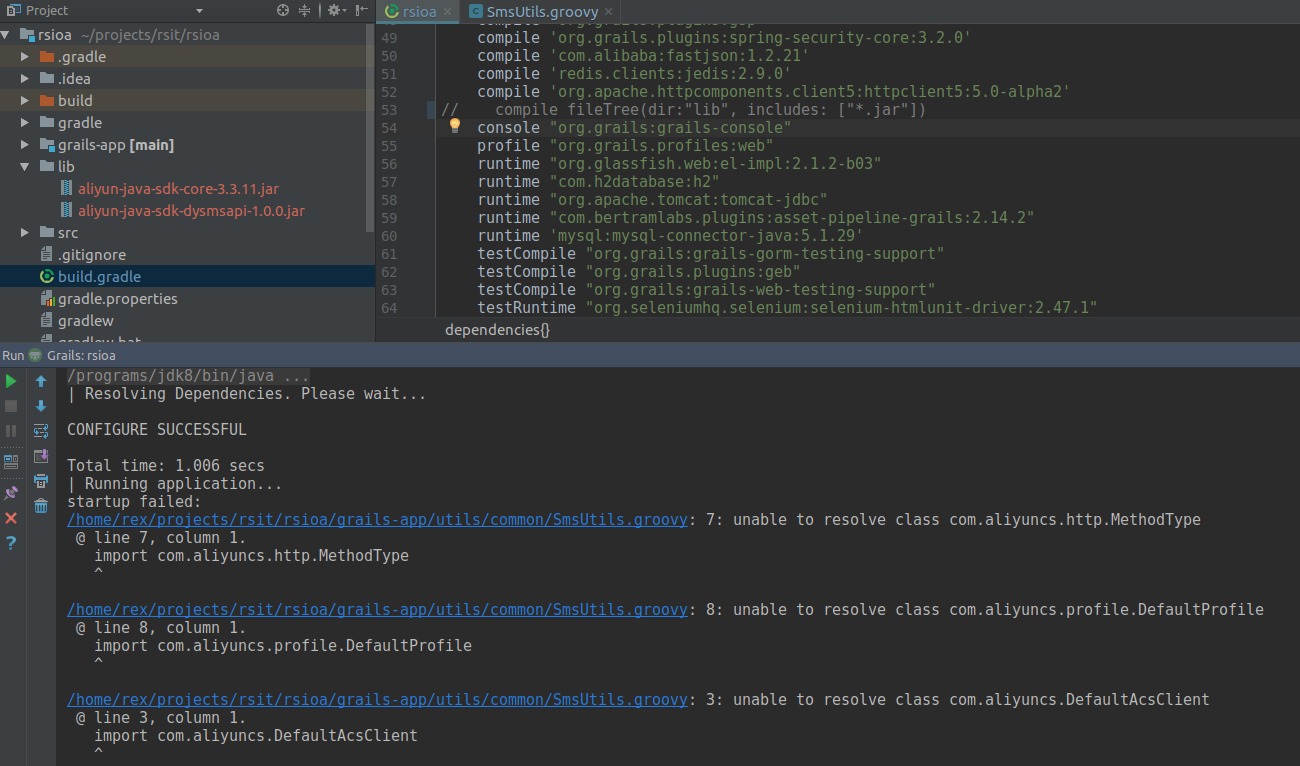
然后打开项目中的build.gradle文件,添加:
compile fileTree(dir:"lib", includes: ["*.jar"])
如下图:
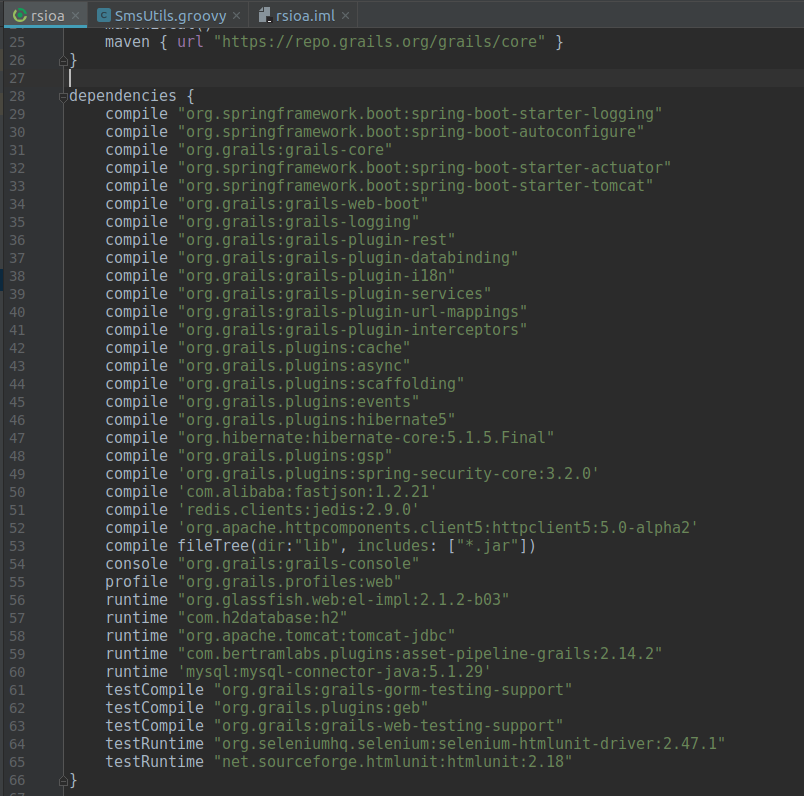
然后在运行项目就不会有问题了,如果不添加这行会报错“unable to resolve class”:
在IntelliJ IDEA中打包Java项目
在IntelliJ IDEA中打包Java项目可以通过使用Maven或Gradle构建工具来实现。下面分别介绍两种方式的操作步骤:
1. 使用Maven打包Java项目:
- 确保您的Java项目中已经配置了Maven依赖,并且pom.xml文件中已经定义了项目的构建配置。
- 在IntelliJ IDEA中点击菜单栏中的 "View" -> "Tool Windows" -> "Maven" 打开Maven工具窗口。
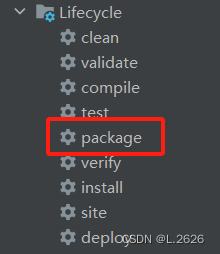
- 在Maven工具窗口中选择您的项目,在 "Lifecycle" 中双击 "package" 进行打包操作。
- 打包完成后,会在项目的 target 目录下生成打包好的 JAR 文件。
2. 使用Gradle打包Java项目:
- 确保您的Java项目中已经配置了Gradle构建工具,并且 build.gradle 文件中已经定义了项目的构建配置。
- 在IntelliJ IDEA中点击菜单栏中的 "View" -> "Tool Windows" -> "Gradle" 打开Gradle工具窗口。
- 在Gradle工具窗口中找到您的项目,然后点击 "Tasks" -> "build" 进行打包操作。
- 打包完成后,会在 build 目录下生成打包好的 JAR 文件。
Intellij IDEA Maven打jar包
xMain.class 一定记得写包名 package com.example.myapplication;<project>...<build><plugins><plugin><groupId>org.apache.maven.plugins</groupId><artifactId>maven-assembly-plugin</artifactId><version>2.5.5</version><configuration><appendAssemblyId>false</appendAssemblyId><descriptorRefs><descriptorRef>jar-with-dependencies</descriptorRef></descriptorRefs><archive><manifest><!-- 此处指定main方法入口的class --><mainClass>com.example.myapplication.Main</mainClass></manifest></archive></configuration><!--下面是为了使用 mvn package命令,如果不加则使用mvn assembly--><executions><execution><id>make-assembly</id><phase>package</phase><goals><goal>assembly</goal></goals></execution></executions></plugin></plugins></build>...</project>
Intellij IDEA gradle打包jar
使用 IntelliJ IDEA 来构建和打包 Java 项目的方式有很多,其中一种比较常用的方式是通过 Gradle 打包生成 JAR 文件。
下面是在 IntelliJ IDEA 中使用 Gradle 打包生成 JAR 文件的步骤:
- 在 IntelliJ IDEA 中打开你的项目,并且确保你已经安装了 Gradle。
- 在项目的根目录下,找到
build.gradle文件,并在其中添加以下内容:
xxxxxxxxxxjar { manifest { attributes 'Main-Class': 'com.example.Main' // 设置 JAR 文件的入口类 } from { // 将依赖的库一起打包到 JAR 文件中 configurations.compile.collect { it.isDirectory() ? it : zipTree(it) } }}- 在 IntelliJ IDEA 的左侧栏中选择 Gradle,然后双击
build任务运行 Gradle 构建。 - 构建成功后,在项目的
build/libs目录下可以找到生成的 JAR 文件。
通过以上步骤,你就可以使用 IntelliJ IDEA 和 Gradle 打包生成 JAR 文件了。如果你有更多的问题或者需要更详细的解释,可以继续提问。
gradle配置国内阿里云镜像
对单个项目生效,在项目中的build.gradle修改内容
xxxxxxxxxxrepositories {// mavenCentral()maven { url 'http://maven.aliyun.com/nexus/content/groups/public' }maven { url 'http://maven.aliyun.com/nexus/content/repositories/jcenter' }}
对所有项目起作用
在USER_HOME/.gradle/下创建init.gradle文件
xxxxxxxxxxallprojects{repositories {def ALIYUN_REPOSITORY_URL = 'http://maven.aliyun.com/nexus/content/groups/public'def ALIYUN_JCENTER_URL = 'http://maven.aliyun.com/nexus/content/repositories/jcenter'all { ArtifactRepository repo ->if(repo instanceof MavenArtifactRepository){def url = repo.url.toString()if (url.startsWith('https://repo1.maven.org/maven2')) {project.logger.lifecycle "Repository ${repo.url} replaced by $ALIYUN_REPOSITORY_URL."remove repo}if (url.startsWith('https://jcenter.bintray.com/')) {project.logger.lifecycle "Repository ${repo.url} replaced by $ALIYUN_JCENTER_URL."remove repo}}}maven {url ALIYUN_REPOSITORY_URLurl ALIYUN_JCENTER_URL}}}
IntelliJ IDEA设置Maven国内阿里云镜像
0x00 前言
最近用IntelliJ IDEA构建Maven项目,但是reimport的速度超级慢,应该是官方源在国外的原因,所以改成阿里云的源。
0x01 设置方法
- 右键项目,选择Maven->Create ‘settings.xml’(已经存在的话是Open ‘settings.xml’)

- 在settings.xml文件中增加阿里云镜像地址,代码如下:
xxxxxxxxxx <settings xmlns="http://maven.apache.org/SETTINGS/1.0.0" xmlns:xsi="http://www.w3.org/2001/XMLSchema-instance" xsi:schemaLocation="http://maven.apache.org/SETTINGS/1.0.0 http://maven.apache.org/xsd/settings-1.0.0.xsd">
<mirrors> <mirror> <id>alimaven</id> <mirrorOf>central</mirrorOf> <name>aliyun maven</name> <url>http://maven.aliyun.com/nexus/content/repositories/central/</url> </mirror>
</mirrors></settings>1234567891011121314150x02 使用maven导入依赖库
在pom.xml文件上右击,选择Maven->Reimport

0x03 tips
- maven 的的全局配置默认路径是C:\Users[当前用户].m2\settings.xml
- maven的配置路径可以在settings中的maven中修改
报错
IntelliJ IDEA 使用 Maven 方式报错
代码:List<String> stringList = new ArrayList<>(); 报错如下:
xxxxxxxxxx错误:(13, 49) java: -source 1.5 中不支持 diamond 运算符(请使用 -source 7 或更高版本以启用 diamond 运算符)
Java sdk版本 确实为8,发现project的java level 也是8。
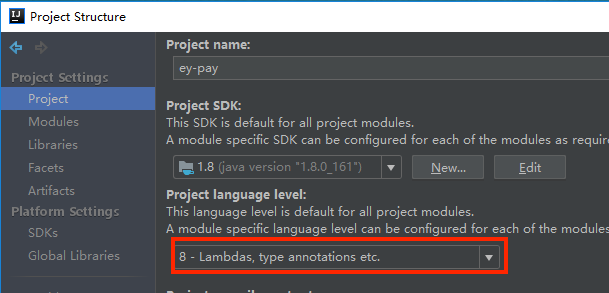
然后继续检查其他模块 如modules ,发现了问题所在。
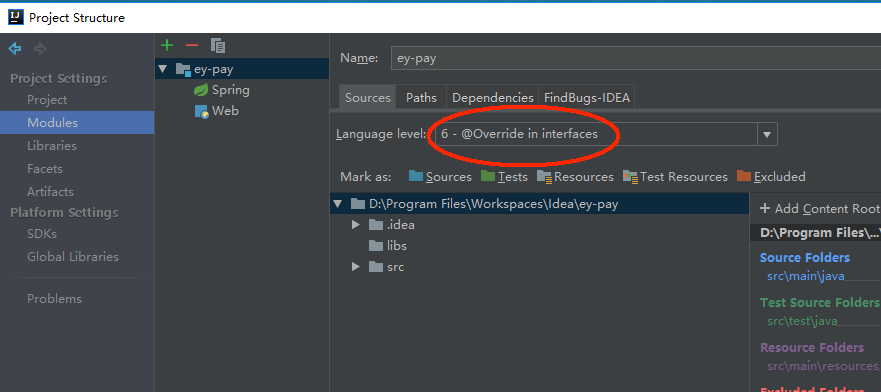
改为8就好了。
还有一个地方,遇到类似问题重点排查的位置:
project structure中的project,module中的sources和setting中的java compiler。